Showing posts with label scratchbuild. Show all posts

Tuesday, January 3, 2012

Whew!

I've got four kits on the bench right now that had mostly been waiting for Tamiya to start shipping paint again. Joy of joys, my LHS just got some in and I will be starting up again. Maybe I can get at least one thing done for CanAmCon this year.

A good friend gifted me with Revell's 1/72 B-17! Wow! What a guy, huh?

When things got frustrating last week with my conversion of a Fairey Rotodyne into a gunship, I put that aside and opened up the B-17. I promised not so much AMS this time and dove in. Here's the thought process:

"Wow, pretty nice kit. Hmm. I think I'll OH MY GOD WHAT HAVE I GOTTEN MYSELF INTO?"

It's a big kit. While waiting for the oil paint woodwork to dry (yes, there was a lot of wood on a B-17), I thought about display and came up with a little diorama idea. For that idea, I needed bicycles.

I searched online and found that the bikes were expensive and not that good. I then found a vintage Airfix WW2 German soldier on a bike and thought I could cut away the figure. No dice.

The only thing left to do was build one. I grabbed some sprue and started stretching. My first bike turned out okay, but the lines were wrong so I hit the internet to find a pic of a 1930's Raleigh. I took this pic, scaled it down to 1/72, traced the fame, tires and fenders in illustrator and made a template:


I laid out the frame and glued it. I made a coil of copper wire on an Xacto handle to make the wheels (the handle's diameter was nearly perfect for a scale 26"). The fenders were rolled styrene sheet.


Here's the difference between the templated (in tweezers) and the non-templated bikes.


I then made a second templated bike just for fun. Here's the trio painted:


And here's a close up of a tempalted bike:


Not bad. We'll see how the B-17 itself turns out!

Saturday, October 16, 2010

Matchbox 1/72 Stranraer: The Madness Revealed

I'm procrastinating inking the newest issue of Obscure Tales and I'm working on the Stranraer. I've completed building the interior and I've painted and washed it. It looks pretty good here. Nice and full:

Remember to click on the images as Blogger crops them to a uniform width. Most are wider


The problem is, when I button it up, it is virtually all invisible; the radio station with it's electronics rack and plush seat can only be seen if you shine a light inside and tilt the fuselage just right. Even through the dorsal gunners hatch, not much can be seen. I was fooled by the white of the Evergreen plastic into thinking stuff would pop out when I painted it cockpit green. Oh, well.

Here's the navigator's station, the only part besides the cockpit that will be visible:


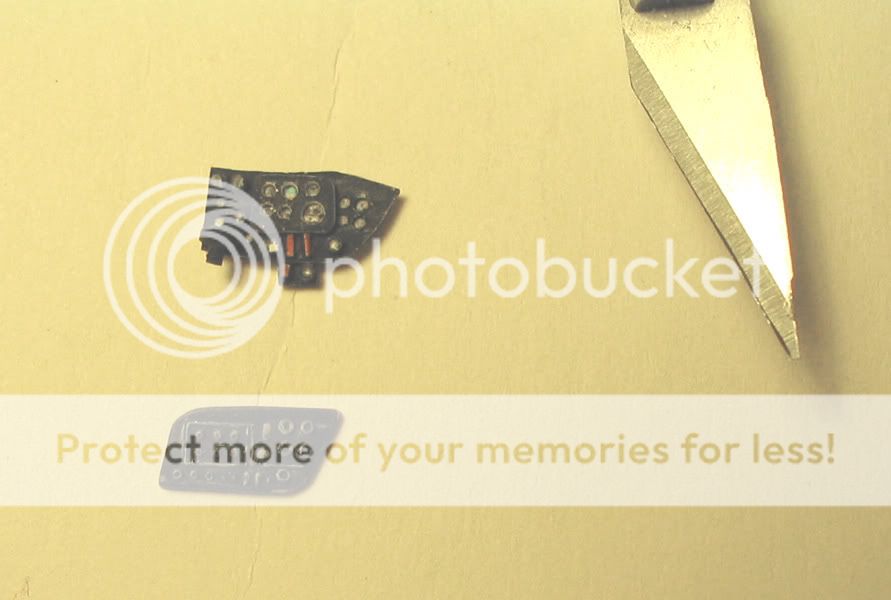
The other thing I did, which will also be nearly invisible, was to make a new instrument panel. The kit panel is an embarrassment (especially when put next to the crisp, well-detailed Lewis guns and pilots). I found a panel layout diagram, drew instrument faces in Adobe Illustrator, laid them out to scale and printed them on paper. I then worked a sandwich of Evergreen sheet and paper. Turns out, that the detailed faces I worked on were a waste of time given the resolution of my HP DeskJet. At least they look busy. What did work nicely was painting the panel black and then twisting an Xacto #11 in the hole to reveal some white. In person, it makes the instruments pop. I'm debating whether to put a drop of Future on the faces as it may degrade the image more.


In other good news, I made a test of a technique I wanted to use on the wings and control surfaces (which are aluminium doped) and it worked! I'll share when I've done it for real and have some pics.

Listening to while posting: "Keep Fishin' " by Weezer

Friday, October 8, 2010

Stranraer: The Madness Continues

With the interior done except for painting, and a break to participate in 24-Hour Comics Day, I've decided to venture into Biting Off More Than I Can Chew Land. It's been a strange journey so far.

The kit canopy is VERY, VERY THICK.


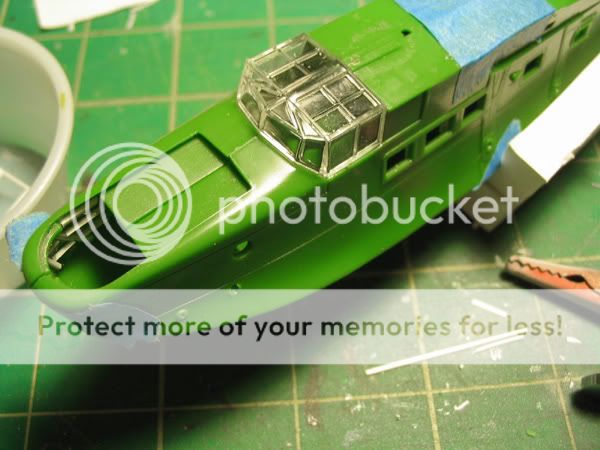
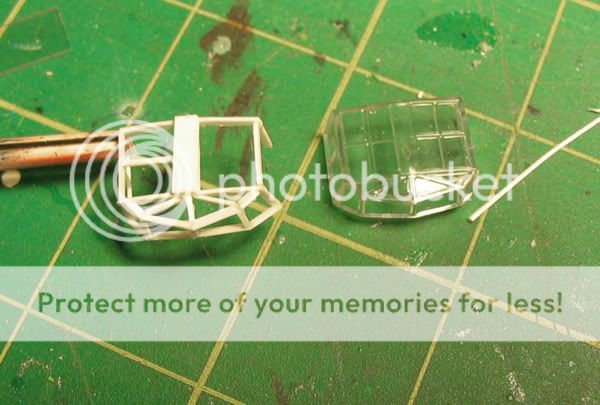
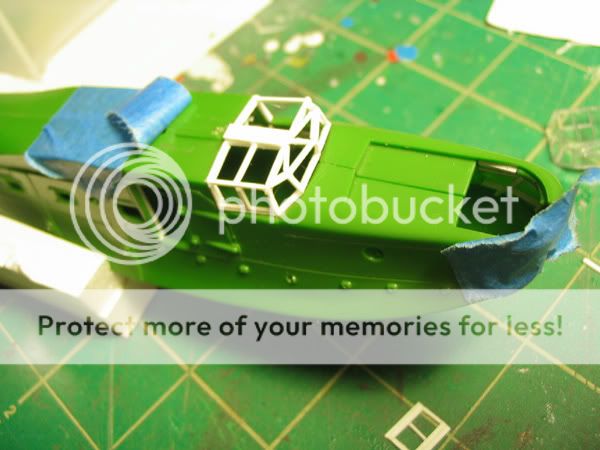
With all that (hopefully) beautiful detail inside, it seems a shame to hide it behind a warped, distorting canopy. So, I've decided to build my own canopy out of sheet styrene and that thin clear plastic they use for packaging headphones and the like.

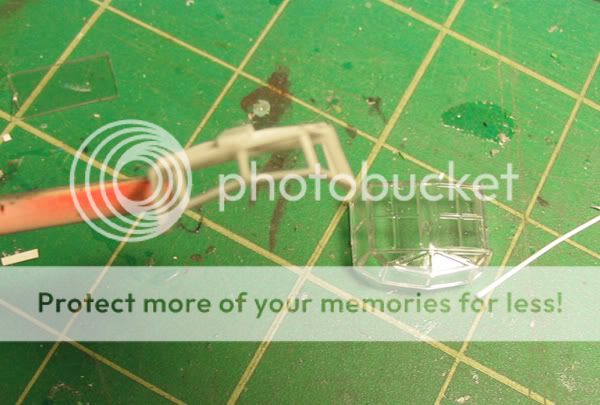
I thought and thought and sketched and sketched and came up with Technique #1. I'm building a frame of styrene. The frames are a bit wider than scale, but I think (hope) that the clearer transparencies will make up for that. We'll see how it paints up (one reason for doing it this way was easier painting of the interior of the frame. My one worry is putting the 'glass' in I have a plan, but it wasn't fully formed because I didn't think I'd get to this point without complete failure.


I've got a tentative plan for Technique #2 which I'll be attempting Sunday. I'm doing that a) just in case placing the glass in the current frame fails or b) it looks like butt.

All in all, this is the smallest, most delicate thing I've made yet. Not only that, it's the smallest most delicate thing that needs to be structural! I'm pushing the limits of my engineering ability and my tools. Some of the parts are so small that I really can't see them when they're in the tweezers. Zowie. Stay tuned!

Listening to while posting: "Swans" by Camera Obscura

Monday, April 26, 2010

FAIL!

Well, the Seimens-Schuckert is a major fail. I did a big post at theHyperscale forums on their, oddly timely, "modeling disasters" section.

Everything you'll need to know about why I'm not posting a finished pic of the Seimens-Schuckert isright here.

I'm doing another T-6 Texan to make myself feel better...

Monday, October 19, 2009

The Eggs and Us

As promised, here are some shots of the other entries to the Mount Mansfield Modelers Egg-stravaganza.

They are presented in the order that they appeared on the table, from left to right (minus mine, btw). Keep in mind that base of these models were eggs that were identical except for color.

First was the pun (and I did groan out loud, but the creator expected it), I give you The Nest Egg:


This requires a bit of explanation. It represents the first solar-powered anti-gravity fighter-bomber in the post-war British inventory (the upper hull has to be transparent for the solar panels to work, see?)


Next came the WW1 entry. The rudder is movable, the wings are doped fabric, the canopy opens and closes and the prop is battery-powered. UPDATE: This beauty took second place


This yellow beauty was created by the guy who's idea this whole thing was (he also generously supplied the eggs. Check out those fabulous eyelashes around those cool windows and the tongue dashboard!


Finally was the Spruce Goose-Egg. Everything was scratchbuilt except or the engines and props. Look how smooth and perfect the boat hull is; it was made with from scratch with plastic cardstock. The outboard pontoons were carved from wood then molded on a vacuum-form machine.


listening to while posting: Sweet Enemy chilling out on the floor of my studio with the cat. She just got back from a long drive to Portsmouth and is telling me about all the art framing stuff she learned how to do.

Thursday, October 15, 2009

The Egg and I, Epilogue

Well, I just got back from the Mount Mansfield Modelers meeting and the egg contest was tonight. Man was I nervous! I hadn't felt that nervous since my last Aikido test. Sheesh. First I was worried that it would break in transit, or that I wouldn't be able to assemble it, or it would break on the display table.

Why was I worried about breaking? Earlier in the week, the nose gear fell off three times, each time I was certain it was on for good. However, it made it to the meeting and it stayed whole.

There were seven entries and competition was fierce! Fantastic, fantastic works. Of course I forgot to bring my camera, but I'll try to snag some from another member. The two standouts were a Spruce Goose Egg with the wings, tail and boat-hull nose all scratchbuilt and perfectly shaped and a "Jokker" (A WW1 nut, he couldn't decide whether to build a Junkers or a Fokker) It was a monoplane with movable rudder, full cockpit, doped-fabric-over-wood-frame wings and a battery powered propeller. On the line were two trophies built by the MMM's chairman (a gold and silver egg trophy for first and second place).

There were two rounds of judging; one for first place and one after for second place. I voted for the Jokker both times, but it was tough to decide!

As I said, I didn't get any shots at the show, so here are some shots I just took of the completed Snowflea on the dining room table.


So, how did the Snowflea fare against the other outstanding entries?

Sunday, October 11, 2009

The Egg and I, part three

Nearly done! Here's the test-assembled fuselage. Despite my best efforts, the clear canopy has become dirty. I have to figure out how to clean it without messing with the paint. Grr.

I applied decals. Even though you can't see them, the "28" is not the only decal. I've got a bunch of random things like grounding points, RESCUE arrows and other little things on the lower half. Sorry no pic, couldn't get one to work.


Here you can almost see the expansive cockpit. It is, as you may guess, hard to take a shot of a clear dome without the light reflecting in the middle of it.


Here's the aft section. The ringed hole is the mount for the engine nacelle shaft.


I can't remember if the contest is THIS Thursday or NEXT Thursday. I'm building as though it were this Thursday, so I'll post some completed pics before then.

Listening to while posting: "Gebrauchmusik II" by Adrian Legg

Thursday, October 1, 2009

The Egg and I, part two

Still working on the egg. I got the first coat of paint on, but found that I REALLY need a moisture trap for my airbrush. I never noticed it because I'd been doing most of my modeling in the winter with a wood stove roaring in the next room.

Here's the fuselage. I faked some panel lines (with pencil and pre-shading) because I found the egg plastic did not like being scribed. Or, also possible, I'm a horrible scriber. The color is actually red, but I couldn't for the life of me get rid of the PINK color of the photo. The black thing on top is a radome.

Side view:


Front view (the thing on the front is the door. I'd planned on actually building a door and full interior but the crappiness of the plastic stopped that idea):


Here's the engine nacelle. Again, it isn't that pink.

This is the rear. The black bits are cut-outs where the propeller blades will go:


This is the intake. It features the only cannibalized part on the entire model so far (a spare bogie from some tank or another):


The propeller blades were going to be problematic from the start. I thought I'd try simple and made some out of wood strips. The result was... not good:


So, I tried again in plastic. Stuck, I hit the web and found a picture of a new Hamilton-Sundstrand prop and tried to copy that. Here's an in-progress pic. The tough thing is getting the four blades to be even closely related to each other. Next time, I'm doing one and then casting the rest out of resin:


The cockpit is turning out well, I added the instrument panel:


Here's a shot of the instruments. I designed up a set of instruments in Adobe Illustrator and, since I didn't have any decal paper yet, so I used sticker paper. The effect is not bad. The only problem is you can't move the stickers around like you can with decals.


Another view:


A close up, looking forward through the cabin door, showing the raised bits (fire suppression t-handle, throttles and some buttons). After I looked at this shot, I realized I had to re-position some of the instrument clusters as they are a bit askew:


That's all for now. I'm coating it in future and plan on assembling the engine soon. The contest is two weeks from today. I hope I at least get a nod or two from the old hands.

Sweet Enemy bought me a wicked cool Japanese model for my birthday. Oh, it is sweet. I can hardly wait to build it. But, since it is from SE, and it's hard to find, I'm putting it at the bottom of my stash so that my skills will be up to it when I get to it. Hopefully.

Listening to while posting: Scherzo: Allegro & Finale by Beethoven (played by the London Symphony Orchestra)

Friday, September 18, 2009

It's been a while part one: The Egg and I

I may not have been posting, but I've been doing stuff. My local modeling club (the No Website Club, it seems) is having a contest. Back in May, one of the guys bought a bunch of ostrich-sized plastic eggs. Split longitudinally, half the egg is clear and half is opaque. Anyone who wanted to enter took an egg. There are only two rules:

1) if you take an egg, you have to make something.
2) a significant portion of the clear part must be left clear.

I took the challenge, but when I got home I realized that, since I have only been modeling again for less than a year, I have no stash of leftover parts. This meant that I would be having to scratchbuild the entire thing. Talk about biting off more than you could chew.

I dug and dug into my brain and came up with the idea of this thing. I've been into Forties and Fifties radio Sci-Fi for a while and thought about making some sort of exploration vehicle that an Golden Age-style exploration ship would drop onto a planet. Not having any wheels, I decided on an exploration vehicle for arctic-climate worlds and that meant skis:


the Heiden-Brinker SS-3b "Snowflea" is based on the Lotus Ice Vehicle a real vehicle made by the luxury car company.

A bit ambitious, but I pressed on. I drew some nearly-scale (1/48) plans (floor plan, furnishings and structure) and started in. My first test was to make a leg out of sheet styrene. It worked so well, I made all three.


Then I actually began working on the interior of the hull and the cockpit floor, but I have no images of that in progress. It was really hard for two reasons. First, constructing vertical bulkheads to fit the curve of the egg was nearly impossible (as I can't really get a good cross-section of it without cutting it apart). Secondly, the plastic of the egg is awful. It is very soft and no adhesive I have works, not model glue, not CA glue, not white glue; I don't want to try anything harder as it might melt the whole thing into a pile of slag. So, I'm doing a lot of wedging. to keep it structurally sound.

I then made four seats. This was extra-tough. Making one of something is easy, making four is hard. If I do something like this again, I'm going to make one and cast the rest in resin. As it is, each chair is more similar than identical. Ah, well. This wasn't going to win any contests anyway. Here's the cockpit:


And the cockpit next to the hull with the hull interior. You can see the beam that crosses the entire hull. This is the main support for the left and right main skis. Since I couldn't glue hinges to the side, I had to make it structurally sound by putting the solid beam through:


And the cockpit installed on the hull:


The engine is proving difficult. I tried cutting a smaller plastic egg, but cutting a perfectly circular hole for the inlet was impossible (and with the crappy egg plastic, I couldn't keep anything glued in anyway). I happened to find some cheapo wooden eggs with a flat bottom at a craft store. Sweet enemy's father drilled a hole in the bottom for me and I was on my way:


One part I'm proud of is the 'ice brake'. The Lotus has this and I replicated it as simply as I could:


I've begun painting it, but ran into a snag that is a lack of water trap for my compressor. Nothing like having your airbrush spitting water all over your work to slow down the process.

Well, the sun just came out, so I'm going outside, darn it!

listening to while posting: "The District Sleeps Alone Tonight" by The Postal Service

Monday, March 9, 2009

Martin MB-2: Sow's Ear Edition

I had a bunch of armor models lying around that I'd never build (one M113 ACAV was purchased in 1989 and was still only 3/4 built) and gobs and gobs of 1/35 figures, guns, heads, and assorted gew-gaws that I'd never use. I found out that a co-worker of mine builds and so I tossed them his way. I asked nothing in return except that they be built within a year; if they were to sit in a stash, they could sit in my stash and soothe my nostalgia.

The next day, he brought in a model he'd never build: a Martin MB-2 by a company called Glencoe. Apparently, Glencoe was an injection molding company that made models of odd subjects on the side. If this was any indication of their injection molding capabilities, I can see why they are out of business. This is a pretty terrible model. Where there are guide pins, they don't align, or the holes are so close to the skin that they are ripped; The injector points are in the stupidest places (trailing edge of fabric wings, center of mesh radiator screens); The pieces have no numbers unless they are large pieces, then it's stamped on; Sink marks; The figures, are an embarrassment; and the model is 25% flash.

It does, however have some very, very nice box art.


So, why am I building it. I have no idea really, except that I am between models, waiting for a Revell SNJ/T-6 Texzn to arrive from Great Models Webstore and I needed to build something.

So, I grabbed the engine and decreed if I could make the crappy engine look decent, I'll build the whole thing. Here's a compare of the unpainted engines.


First, I assembled the not-well-fitting pieces and puttied the bejeesus out of it. I'm actually very happy with how it turned out as I had to do some carving of the plastic to make things align; and it's smooth as a baby's cheek. I then carved away the wire/hose looking things below the cylinders and made new ones out of brass rod. I also added little ribbed supports that would have been cast into the block. You can barely see them as the white bits behind the brass. I also added exhaust pipes. Glencoe couldn't even make exhaust pipes. How hard would it have been? Jeezum.

The manifold that would go on top of the engine was problematic. I could have made an entire new one, but It would have been a pain and besides, I couldn't find a good reference for it. So, I just made some new 'blowers'. The new one is raised up a bit because I added some geeblie wires on the underside to flesh i out a bit.


The radiator needed work. As mentioned there's an injection mark in the middle of the screen. Check it out


The mesh is actually HO scale chain link fence that I had lying around for some reason (I may not have a current stash, but I have box full of model pieces that go back to the early 80s).

My SNJ Texan gets here on Friday, so the MB-2 may go into hiatus, but I think I'm doing pretty good so far and will complete it. Firstly because I could only find two examples on the web and also I'd like an excuse to buy one of these puppies

listening to while posting: The Elements (live) by Tom Leher